Article describes the installation of PowerFlarm. Mainly focussed on the older portable 'brick' flarms. From the supervisor experience these are fickle. Article need to be updated with details about the PowerFLARM core and the PowerFLARM Fusion
PowerFLARM general information
The manufacturer's website: PowerFLARM
PowerFLARM Portable installation
This article is based on information John (bumper) Morgan supplied about his installation of his portable PowerFLARM unit.
Note that, as shown, the installation is only suitable for internal battery powered usage. If PowerFLARM is connected to the glider's battery, the power cord must have a connector that separates easily to allow the canopy to be jettisoned.
Williams Soaring now (May 2012) produces a carbon fiber bracket for those of us without John's skills and ambition.
Note: Owners with Portable installations are encouraged to share them with the group - nothing fancy needed, just some text about how well it works, what you would suggest doing differently, and a picture or two, as needed.
I had initial concerns about ordering the portable version of the PowerFlarm, but after installation, I'm glad I tried it instead of waiting for the "brick". This installation allows me to quickly move it to my other aircraft.
Weather has delayed testing in the air, but I've tested it in my truck and so far have not had any run-ins with airliners on Hwy 395. It does a good job of displaying aircraft that have ADS-B out, and the PCAS function is, according to my limited testing, every bit as good as the Zaon MRX. It'll have to wait for in flight testing to see if there's any issues with interference from the on-board transponder.
The panel picture is taken from close to where my head would be, and as you can see, the PowerFLARM does not block any of the outside view or the panel instruments. A really ideal location, IMO.
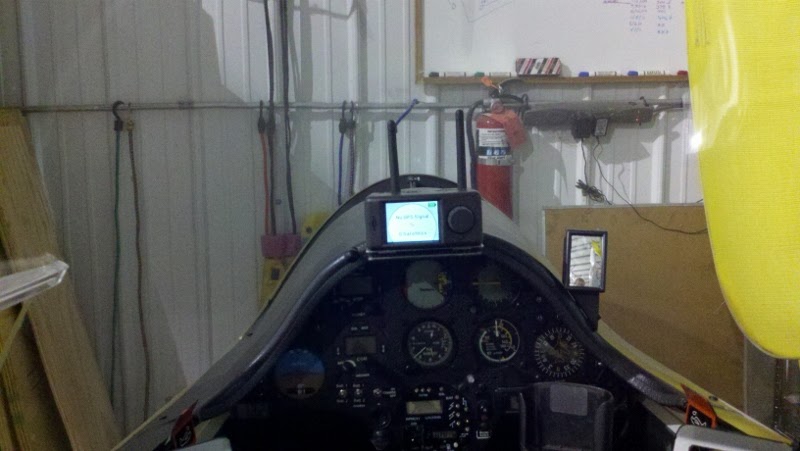
The antennas are too tall to allow the unit to go on top of the glare shield. One option would be to remote the antennas, but I wanted to make it simple to move the unit around. Making a shelf to move the PowerFLARM closer to the pilot has the added advantage of easier control reach while making the antenna clearance a non-issue.
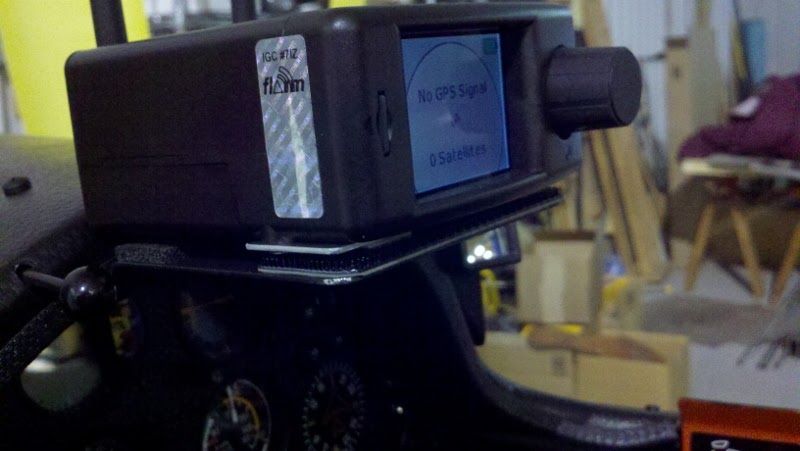
I needed to keep the PowerFLARM clear of some stuff at the top of the panel, so I put a joggle in the shelf.
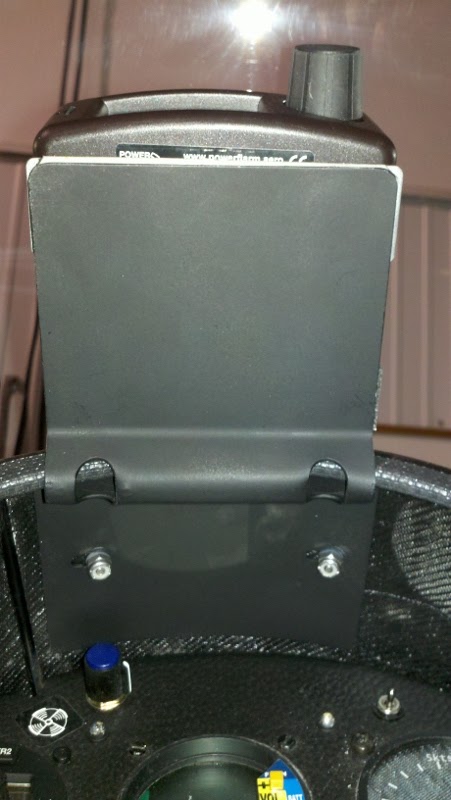
The shelf is made in two pieces of .050" aluminum. One piece is bent to match the curvature of the underside of the panel, and the shelf portion is then TIG welded to make a radiused corner (not shown in pictures). The holes for the two mounting screws are slotted to allow for horizontal alignment of the shelf.
To make without welding, one could use a shaped wood spacer block between the aluminum shelf and the underside of the glare shield.
PowerFLARM "Brick" installation
Peter Kelly produced this article about his installation of the "brick" in his ASH 26 E. The antenna installation seems to equal the best, as of this writing (Oct 2, 2012).
Owners with "brick" installations are encouraged to share them with the group - nothing fancy needed, just some text about how well it works, what you would suggest doing differently, and a picture or two, as needed.